

Today a subscriber asked me to provide some photos and details for how I made my test cart. This is the one that I use to test thrust and current drawn on my electric motors used in my planes. Of course there are times that I just do it in the plane itself, but sometimes, when acquiring a ‘new to me’ motor, I want to know how it will perform so I know what sort of plane to use it in.
So, here is the basic plan. Not to scale, but it should get you on track:
Now for some comments.
My plywood mounting block is a bit of a dog’s breakfast. You can do better. Mine was scrap that already had some holes in it, then I think I decided to make the shaft clearance hole bigger with a spade type bit and without anything to guide the bit! Anyhow, for yours, locate the centre, then mark out the hole circles for various motors. Do them all now, because once you have drilled the hole in the middle it will be a lot harder. I have motors with 44, 50, 56.5 and 58 mm mounting circles. Mark the mounting holes for each circle, staggering them as you go out to each circle (see the two circles on the plan). You actually only need two holes per circle, opposite each other.
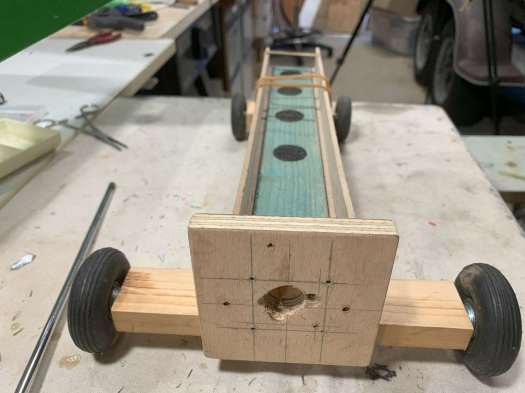
The dimensions of the various items are rather arbitrary, but you want it long enough to hold your battery, ESC and possibly a receiver. The width between the side panels needs to be enough to hold your largest battery in place.
It’s a good idea to drill the holes for the wheels with a drill press to get them nice and perpendicular, and the same height. I did that before mounting the wood bits. I used screws for the front wheels and nails for the back for axles. You could even use piano wire.

It wouldn’t hurt to mount the front set of wheels back an inch or so. That will give you more clearance to the end of the bench that you will be running the test on.
Here is a video showing the testing:
